
We are on a mission to help ambitious sales & success teams reach their goals and grow. By breaking down the barriers that have prevented coaching & collaboration we help teams unlock their potential.
Overview of the dialer:
"Modern customer service. Your way. We want to end bad customer service by empowering enterprises with a modern AI-powered contact center platform to improve customer experiences, increase efficiency, and grow revenue. We believe modern customer service is the edge your business needs". Talkdesk website
With Talkdesk Dialer your conversations will be automatically imported into Jiminny where they will be transcribed and analyzed. You will be able to search, listen and share knowledge to your entire organization. The coaching opportunities are endless - self-coach, learn from a peer, gain valuable feedback from a manager, etc.
Setup type:
You’ll need to get in touch with us in order to help you get set up but we’re very friendly and efficient so don’t worry!
Prerequisites:
Talkdesk provides a non-standard OAuth2 based authentication for integrating with 3rd party service vendors. For that reason the setup process cannot be accomplished with a simple “button click”.
Integrations are being set manually, and involves next preparations:
I. Your admin should Allow Calls to recorded - Go to the “Admin / Preferences” from the main menu:
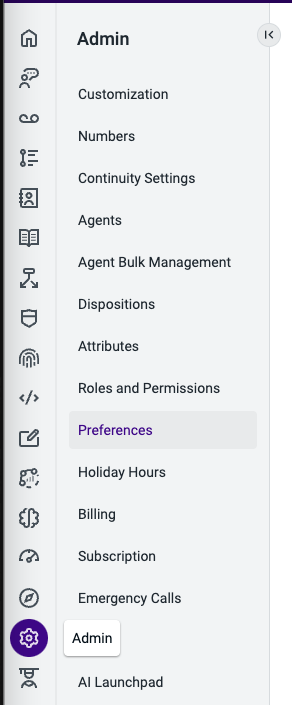
Scroll down to Call Settings:

Within the section - allow call recordings for Inbound calls and Outbound Calls, and set “Dual Channel Recording” to enabled. With those settings, you will have both inbound and outbound calls recorded with stereo channels and good quality.
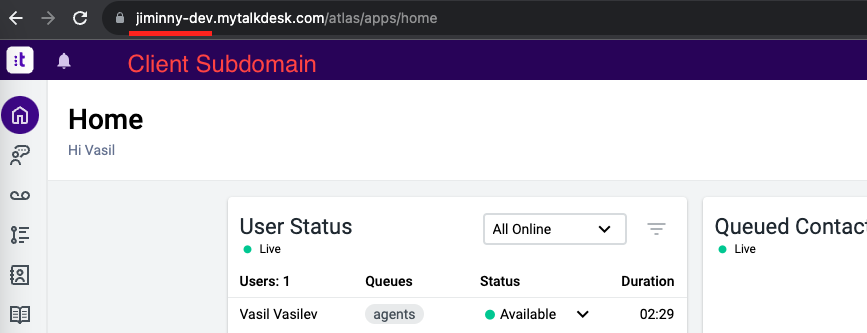
II. Client Subdomain - The client subdomain acts as a “namespace” for all customer activities and is always present in the URL after logging in to Talkdesk.
III. Client region - Talkdesk supports 3 separate regions where a client account can be created. The client region is one of the following: US, CA, or EU. The region is mandatory, since there are separate authentication endpoints for each region. More on regions: https://docs.talkdesk.com/docs/how-to-guarantee-your-app-works-in-all-regions. The region is not visible within the Talkdesk UI, but is part of the setup process for each client. If you do not know which region your Talkdesk setup is, we can test against all 3 regions, until we match the correct one, or ask your Talkdesk account manager.
IV. Integration Oauth Setup - for each 3rd party integration the client must set up a separate OAuth client.
For a new OAuth client to be set one needs to go through the following steps:
1. Visit "Builder / Oauth Clients in the main menu"
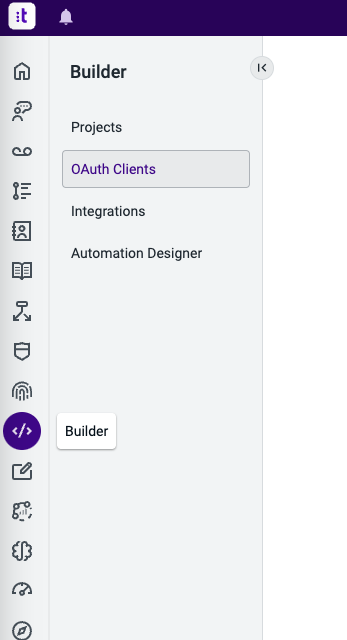
Once within the “OAuth Clients” page, on the right top side of the page there’s a large blue button “New OAuth client” which will start the process of setting up a new client.
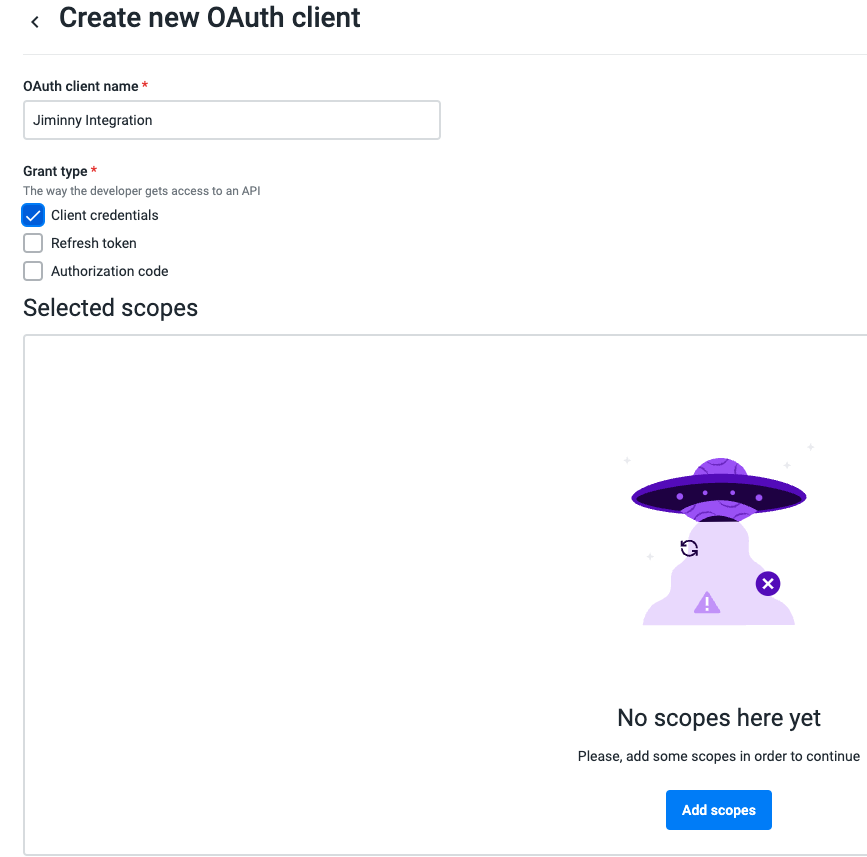
2. New Oauth Client setup:
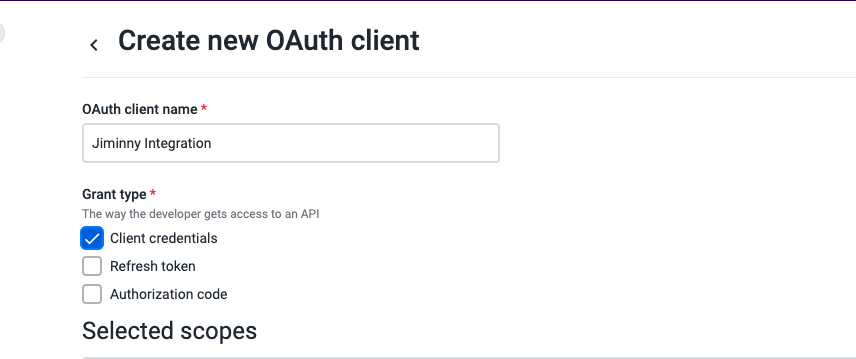
Fill in a descriptive name for the OAuth client and select “client credentials”.
3. Add scopes - this step grants the necessary permissions for the integration to operate normally. Scopes are set on the same page.
Click on the “Add scopes” button at the bottom of the page:
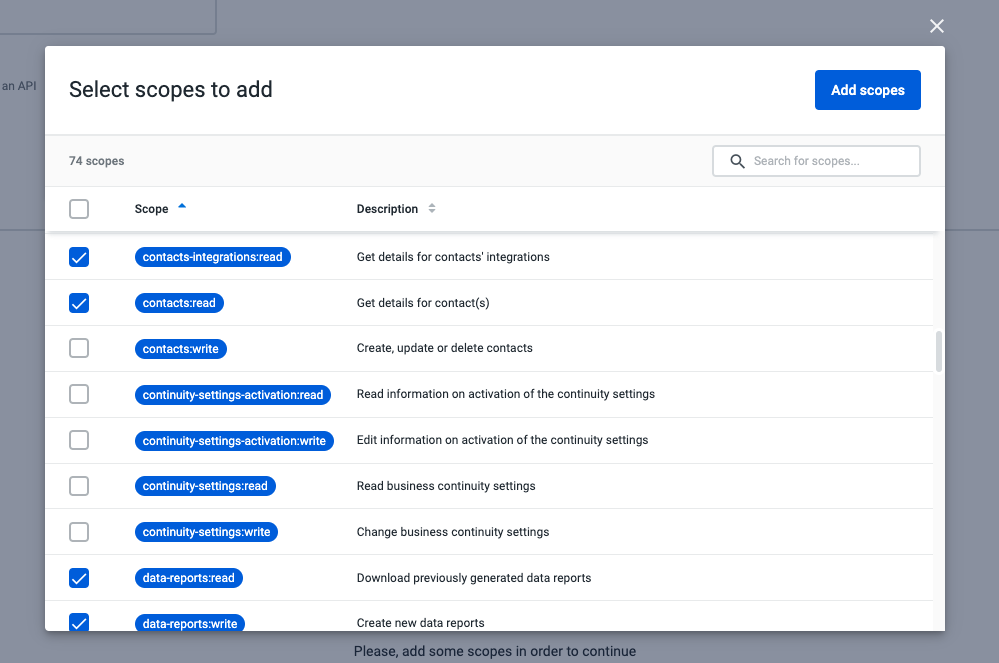
Now we need to select the following list of permissions (scopes) for the integration to work as expected:
- opened
- recordings:read
- reports:read
- users:read
- contacts:read
- data-reports:read
- data-reports:write
- record-lists:manage
-
contacts-integrations:read
4. Enable all checkboxes for all scopes in the popup window, and then click “Add Scopes”
5. Verify all scopes are correctly set, and save then click “Create” (top right corner blue button)
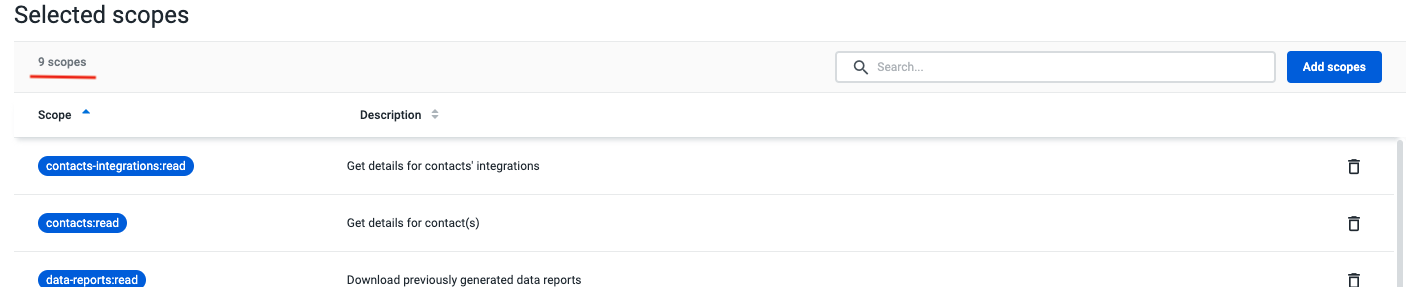
If any of the mandatory scopes is missing, it can be added by clicking on “Add scopes”. Any scopes outside of the provided list are not necessary and can be deleted.
6. Create the Auth Client - at the top right corner of the page, click the blue “Create” button.
Your new OAuth client has been created.
The next step is very important - in a popup window, the newly created OAuth credentials will be displayed. Credentials are displayed once for each setup.
The page looks like the following:
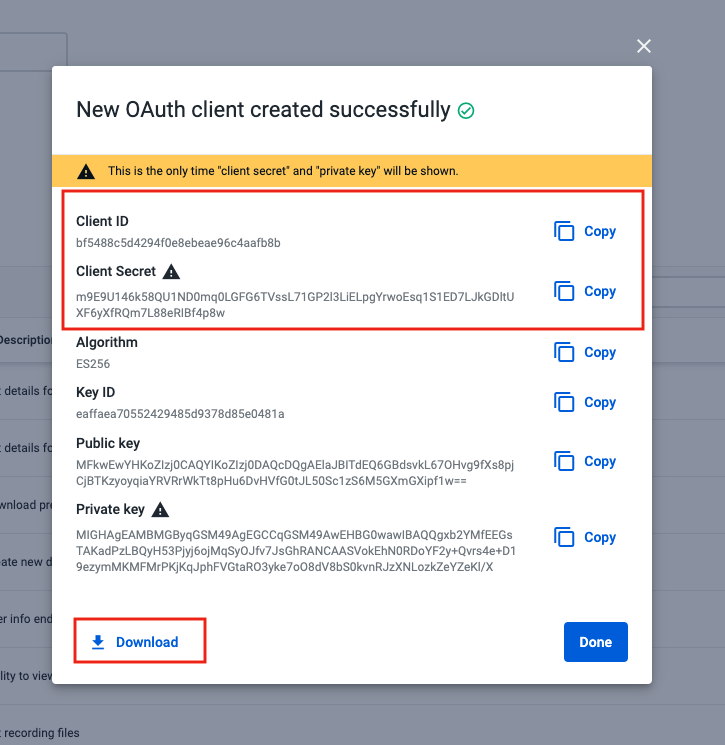
Jiminny needs “Client ID” and “Client Secret” to establish a secure integration to Talkdesk, and pull and analyze conversation records.
This page allows the client to download a JSON text file containing all credentials. We strongly recommend the file is downloaded and kept in a secure location - this file can be used in case the Client ID or Client Secret are lost.
Please securely share the files with Jiminny. If you don’t have a secure way, we can create a temporary dropbox in Google drive for you.
Once the Client ID and Client Secret are supplied to Jiminny, we can set up the integration and start analyzing your call records.
Your email address in Talkdesk must match either your primary or your secondary email in Jiminny. This is mandatory as it enables our system to correctly match all calls to their respective Jiminny user.
Installation:
Please provide us with the following information and we'll set the integration up for you:
- Client ID and secret - get them from the created Oauth client
- Your Talkdesk client region - one of the US, CA, or EU
- Talkdesk client subdomain
Key Benefits:
All the calls will be imported within fifteen minutes of them taking place. Isn't that amazing? 🚀
It will increase visibility as each member of the team will be able to find the exact key moment in the call in seconds to pinpoint coaching moments. 🔥
You will be able to join a call and live-coach it, leave feedback throughout any playback, share specific key moments with the team and much more.
FAQs
Which calls do we pull in?
Once the Talkdesk Integration is connected, Jiminny will start to import all calls made in Talkdesk by active Jiminny Users.
Calls should be imported and processed in Jiminny no later than 15 minutes after the call has ended in Talkdesk.
Which calls don't we pull in?
Those where the user doesn’t exist in Jiminny.
What if my calls are not pulling into Jiminny?
Please check if your email with Talkdesk matches the email you are currently using with Jiminny. We'll need both emails to match for us to be able to pull your calls through.
If your email being used in Talkdesk is different to the one in Jiminny, then you'll be able to go onto profile in Jiminny, then under "Secondary email" you can enter the second email to enable Jiminny to sync and pull in your calls.
How does the mapping between Talkdesk, CRM & Jiminny Work?
When we import a call from Talkdesk, we look for your prospect's details in your CRM by their phone number. In case there's a match, we will link the call to your prospect and/or deal. Please keep in mind that if the number you are calling is not in your CRM, this won't work.
If you still need any assistance, do not hesitate to contact our Support team! 🚀